AWS credentials
Using a static AWS access key and secret
You can use AWS Access Keys to authenticate to the AWS API from TriggerMesh components. The page Understanding and getting your AWS credentials contains instructions to create access keys when signed-in either as the root user or as an IAM user. Take note of the Access Key ID and Secret Access Key which need to be provided to TriggerMesh.
Below is a quick summary of how to create an access key for a specific user in the AWS console:
- Log in to the AWS console and open the IAM service
- Select Users from the left menu, select the user you want
- Open the security credentials tab and scroll down to the section called "Access keys"
- Click on "Create access key", choose "Application running outside AWS" as the use case
- Create the key, and make sure to copy the secret access key as it will only be visible once
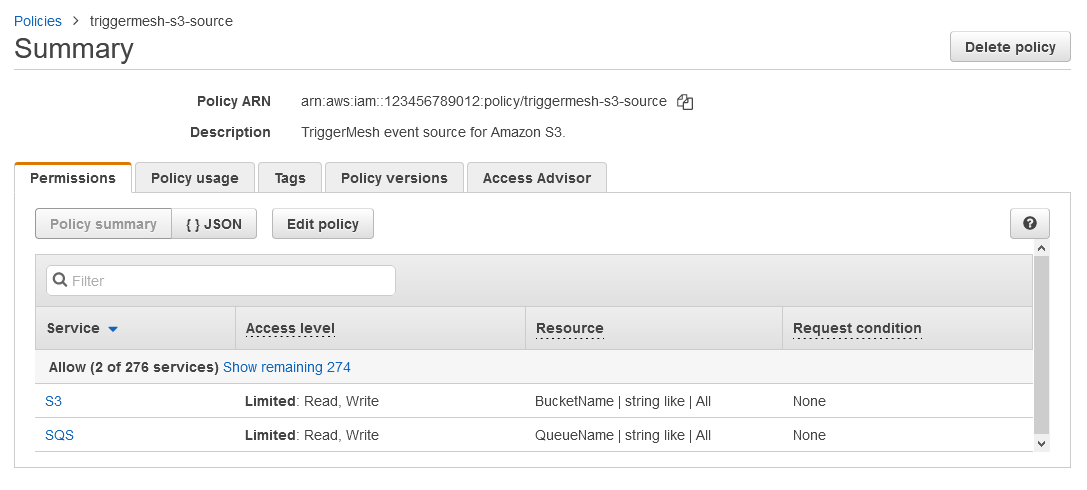
It is considered a good practice to create dedicated users with restricted privileges in order to programmatically access AWS services. Permissions can be added or revoked granularly for a given IAM user by attaching IAM Policies to it.
As an example, the following IAM policy contains only the permissions required by the Amazon S3 event source to operate:
{
    "Version": "2012-10-17",
    "Statement": [
        {
            "Sid": "S3SourceConsumeMessages",
            "Effect": "Allow",
            "Action": [
                "sqs:GetQueueUrl",
                "sqs:ReceiveMessage",
                "sqs:DeleteMessage"
            ],
            "Resource": "arn:aws:sqs:*:*:*"
        }
    ]
}
There are cases in which additional permissions are required, such as when the TriggerMesh component manages other AWS resources on your behalf. For example, the S3 source uses an SQS queue under the hood to gather and consume S3 bucket notifications. You can either provide a reference to an existing queue that you created beforehand, or you can let TriggerMesh create it on your behalf by providing the following permissions to the TriggerMesh controller:
{
    "Version": "2012-10-17",
    "Statement": [
        {
            "Sid": "S3SourceGetBucketLocation",
            "Effect": "Allow",
            "Action": [
                "s3:GetBucketLocation",
                "s3:GetBucketNotification",
                "s3:PutBucketNotification"
            ],
            "Resource": "arn:aws:s3:::*"
        },
        {
            "Sid": "S3SourceManageQueue",
            "Effect": "Allow",
            "Action": [
                "sqs:CreateQueue",
                "sqs:DeleteQueue",
                "sqs:GetQueueAttributes",
                "sqs:SetQueueAttributes",
                "sqs:GetQueueUrl",
                "sqs:ListQueueTags",
                "sqs:TagQueue"
            ],
            "Resource": "arn:aws:sqs:*:*:*"
        }
    ]
}
Using temporary credentials with AWS IAM Roles Anywhere
AWS IAM roles anywhere lets you authenticate to AWS using IAM roles from workloads that are running outside of AWS. It works by generating temporary credentials for the external workloads and digital certifactes for the initial handshake.
To use this feature from a cluster with TriggerMesh running outside of AWS, you can use the combination of accessKeyID, secrectAccessKey, and sessionToken authentication parameters from any AWS source and target connectors.
This set of temporary credentials can be requested from AWS, for example by using the AWS CLI as follows:
$ aws sts get-session-token

{
    "Credentials": {
        "AccessKeyId": "redacted",
        "SecretAccessKey": "redacted",
        "SessionToken": "redacted",
        "Expiration": "2023-06-07T21:25:54+00:00"
    }
}
AccessKeyId, SecretAccessKey, and SessionToken from the response can be used in the TriggerMesh connector auth spec to gain temporary access to the AWS API, shown here in an example using AWS SQS target, in which the parameters were stored as Kubernetes secrects:
apiVersion: targets.triggermesh.io/v1alpha1
kind: AWSSQSTarget
metadata:
  name: triggermesh-aws-sqs
spec:
  arn: arn:aws:sqs:1234abcd:queue_name
  auth:
    credentials:
      accessKeyID:
        valueFromSecret:
          name: aws
          key: AWS_ACCESS_KEY_ID
      secretAccessKey:
        valueFromSecret:
          name: aws
          key: AWS_SECRET_ACCESS_KEY
      sessionToken:
        valueFromSecret:
          name: aws
          key: AWS_SESSION_TOKEN
Using an IAM role from an EKS cluster
IAM Role authentication is supported for most TriggerMesh AWS sources and targets. Please make sure you are familiar with the official AWS documentation on IAM Roles before proceeding.
Below is an example manifest that shows how to use it:
apiVersion: targets.triggermesh.io/v1alpha1
kind: AWS*
spec:
  ...
  auth:
    iam:
      roleArn: arn:aws:iam::<redacted>:role/<role-name>
There are two simple steps required to configure authentication on the AWS side:
- enable the OIDC provider for the EKS cluster
- create an IAM Role
There are different ways to achieve these steps, in this guide we'll use the CLI tools: aws and eksctl (installation).
Enable the OIDC provider
We'll use AWS S3 target as an example in this guide. All other targets are configured in the same manner with corresponding resource updates in IAM policies.
Create an IAM policy file with full access to S3 bucket test-bucket:
cat >aws-s3-target-policy.json <<EOF
{
    "Version": "2012-10-17",
    "Statement": [
        {
            "Effect": "Allow",
            "Action": "*",
            "Resource": "arn:aws:s3:::test-bucket"
        }
    ]
}
EOF
Create the policy from the file:
aws iam create-policy --policy-name aws-s3-target-policy --policy-document file://aws-s3-target-policy.json
Set the account variables:
account_id=$(aws sts get-caller-identity --query "Account" --output text)
oidc_provider=$(aws eks describe-cluster --name <my-cluster> --region <aws-region> --query "cluster.identity.oidc.issuer" --output text | sed -e "s/^https:\/\///")
Replace <my-cluster> and <aws-region> with your EKS cluster values.
Create the IAM role
Create role's trust relationship file:
cat >trust-relationship.json <<EOF
{
  "Version": "2012-10-17",
  "Statement": [
    {
      "Effect": "Allow",
      "Principal": {
        "Federated": "arn:aws:iam::$account_id:oidc-provider/$oidc_provider"
      },
      "Action": "sts:AssumeRoleWithWebIdentity",
      "Condition": {
        "StringEquals": {
          "${oidc_provider}:aud": "sts.amazonaws.com"
        }
      }
    }
  ]
}
EOF
Use the create role command as follows:
aws iam create-role --role-name aws-s3-target-role --assume-role-policy-document file://trust-relationship.json --description "TriggerMesh AWS S3 Target role"
This command should return a JSON object with the role details; the ARN field's value is what we'll use in our target later on.
Attach the policy to the role as follows:
aws iam attach-role-policy --role-name aws-s3-target-role --policy-arn=arn:aws:iam::$account_id:policy/aws-s3-target-policy
Create the AWS target
At this point, IAM configuration is done, and we can create AWS S3 Target using our new Role:
kubectl apply -f - <<EOF
apiVersion: targets.triggermesh.io/v1alpha1
kind: AWSS3Target
metadata:
  name: triggermesh-aws-s3-test
spec:
  adapterOverrides:
    public: true
  arn: arn:aws:s3:::test-bucket
  auth:
    iam:
      roleArn: <role arn>
EOF
After the S3 target is created, it can be used as a Sink for other event sources or accessed directly via a public URL if the network's external endpoints are configured.
Head over here for more details from AWS on this topic.
Note that the configuration process (IAM policies, roles, resources) may vary depending on the AWS target used and cluster security requirements.
Additional step when delegating AWS resource creation to TriggerMesh
In certain cases, TriggerMesh can create AWS resources on your behalf to simplify connecting to certain services. For example, with AWS S3, you can either provide the reference to an existing SQS queue that will used to gather S3 bucket notifications, or you can let the TriggerMesh component create the queue for you.
In the latter case, you need to add an annotation to the triggermesh-controller service account and restart the triggermesh-controller pod.
You can achieve this with the following commands:
kubectl -n triggermesh patch sa triggermesh-controller \
  --type merge \
  --patch '{"metadata":{"annotations":{"eks.amazonaws.com/role-arn": "<IAM_ROLE_ARN>"}}}'
This will allow the TriggerMesh controller to use the new IAM role to manage AWS resources on your behalf, such as an SQS queue in the case of the AWS S3 source connector.
Customizing the Kubernetes Service Account used by TriggerMesh
By default, TriggerMesh automatically creates a new Kubernetes service account for each connector component. The name of the service account is derived from the name of the IAM role.
However, you may want to customise the name of the service account to fit your own naming convention, or you might want to reuse an existing service account in order to avoid having creating STS trust relationships for many distinct service accounts.
In order to achieve this, you can simply add a service account name to the IAM auth specification for you connector. Below is an example which extends the previous AWS S3 target specification with a custom service account name:
apiVersion: targets.triggermesh.io/v1alpha1
kind: AWSS3Target
metadata:
  name: triggermesh-aws-s3-test
spec:
  adapterOverrides:
    public: true
  arn: arn:aws:s3:::test-bucket
  auth:
    iam:
      roleArn: <role arn>
      serviceAccount: <service account name>
In the example above, service account <service account name> will be created by the controller. If a service account with this name already exists, the controller checks the labels, and, if the label managed-by has the value triggermesh-controller, then the service account's owners list is updated with the current object. If the label managed-by does not exist or it has a value different from triggermesh-controller, reconciliation is skipped. Then this service account is assigned to the adapter deployment.
The service account's "eks.amazonaws.com/role-arn" annotation can be overwritten by the controller only if the service account is managed by the TriggerMesh controller and there is only one owner to it, otherwise the annotation is ignored to avoid reconciliation conflicts.
It is also possible to omit the roleArn as shown in the example below:
apiVersion: targets.triggermesh.io/v1alpha1
kind: AWSS3Target
metadata:
  name: triggermesh-aws-s3-test
spec:
  adapterOverrides:
    public: true
  arn: arn:aws:s3:::test-bucket
  auth:
    iam:
      serviceAccount: <service account name>
In this case, the service account <service account name> will be created if needed and assigned to the receive adapter deployment. If the service account did not exist before, it will be created without the IAM role annotation (because spec.auth.iam.roleArn is not defined) and the source will fail to authenticate against the AWS API.
Assume an IAM role for cross-account IAM impersonation
A cross-account IAM role can be defined as follows:
  ...
  auth:
    credentials:
      accessKeyID:
        value: <redacted>
      secretAccessKey:
        value: <redacted>
      assumeIamRole: <redacted>
In this case, the access key is used by the TriggerMesh controller to create a client session, and then the assumeIamRole is be used by the connector in question (such as AWSS3Source) to gain IAM permissions.
An STS trust relationship configuration is required on IAM (see the previous section for details on how to set this up).
Cross-account IAM impersonation is useful for instance when multiple teams want to use a specific IAM Role with distinct credentials, including the one being used by the controller itself.