Ingesting Salesforce change data capture events into TriggerMesh
Create a Salesforce application
First off, you can now easily create free development accounts in Salesforce to test features like the API for building applications. You can sign up here.
The TriggerMesh Salesforce source uses [OAuth JWT credentials][salesforce-oauth-jwt] for service authentication. To quote the Salesforce documentation: "This flow uses a certificate to sign the JWT request and doesn’t require explicit user interaction. However, this flow does require prior approval of the client app."
-
First, you will need to generate an X509 certificate for signing and verifying requests. We will be using
OpenSSLbut any other certificate generation tool should work. -
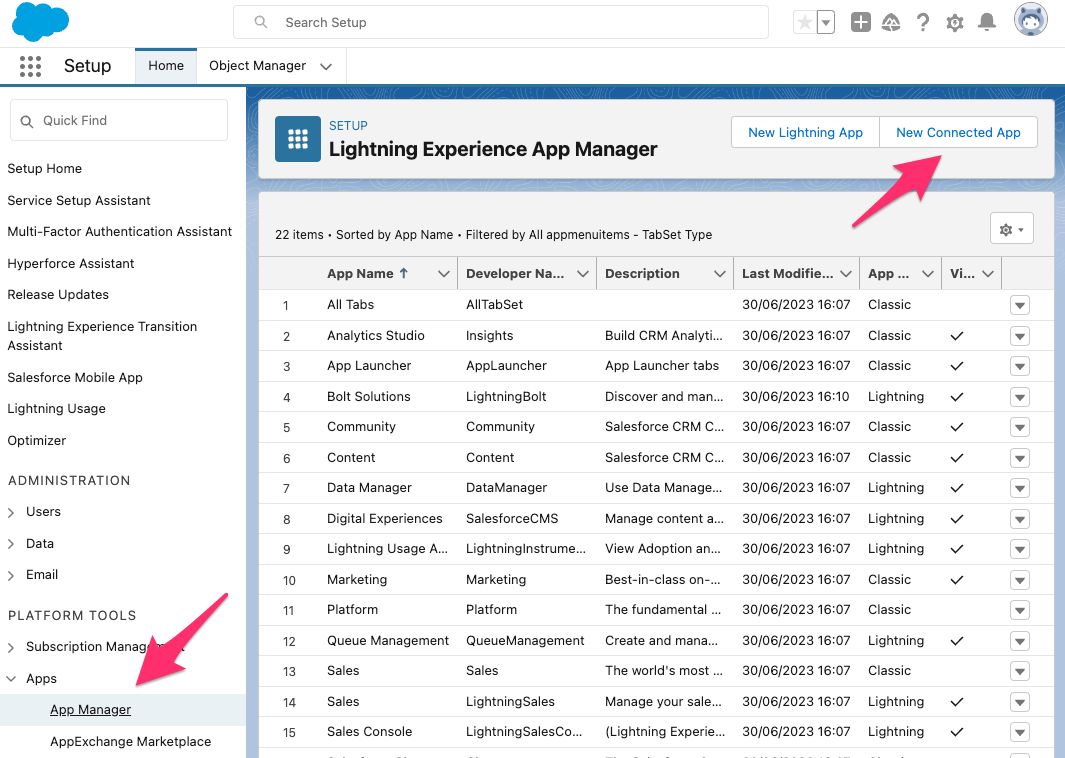
At Salesforce site select
Setup > Apps > App Manager, click onNew Connected App.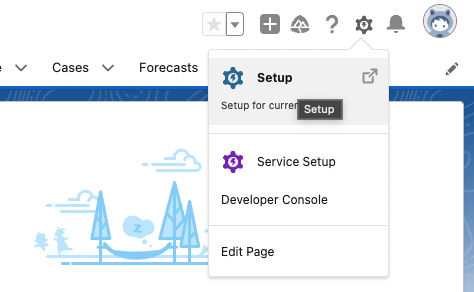
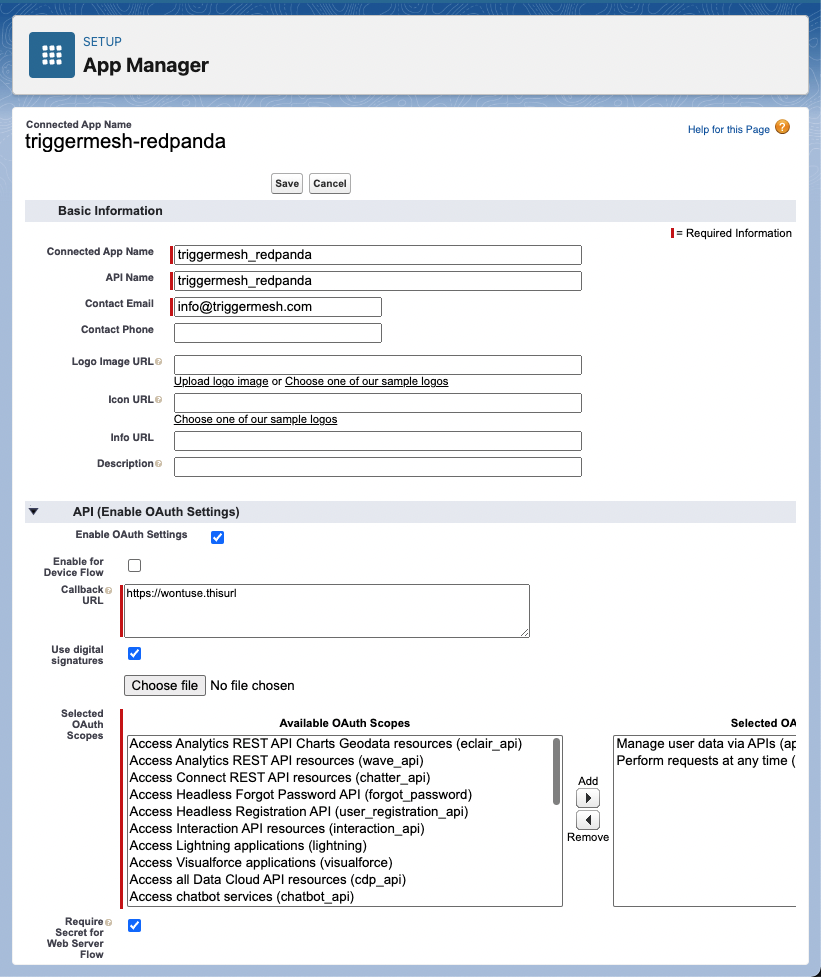
- Fill in mandatory fields, then click
Enable OAuth Settings. - A callback URL is mandatory but can be filled with any HTTPS data.
- Enable
Use digital signaturesand upload the public cert (tm-sf.crtin the example above). - Add Scopes for
apiandrefresh_token, offline_access. - Save
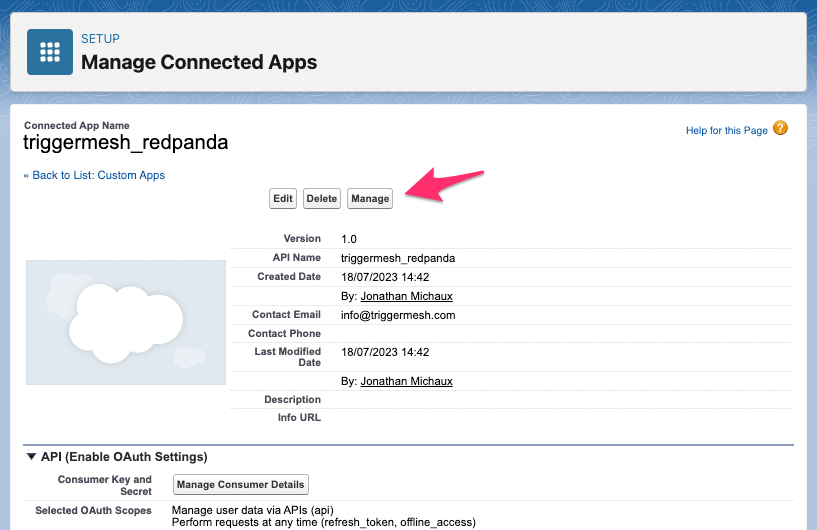
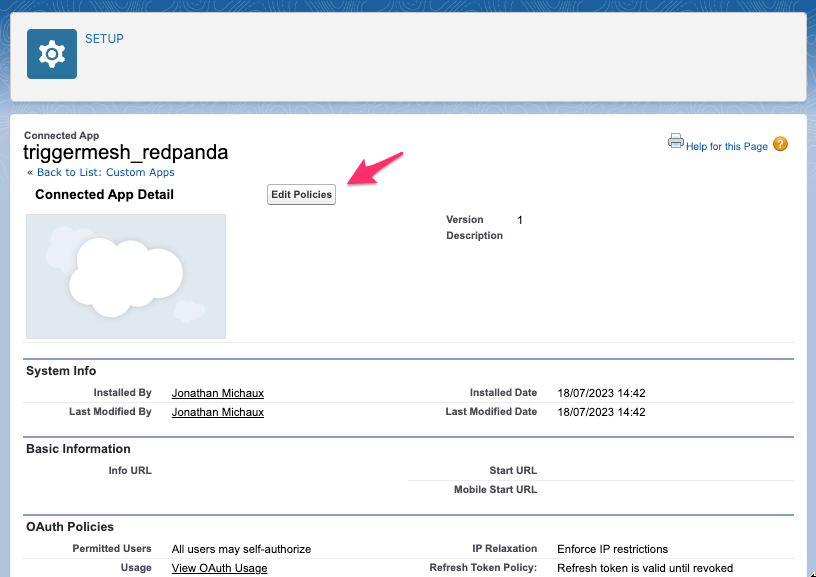
- Click on
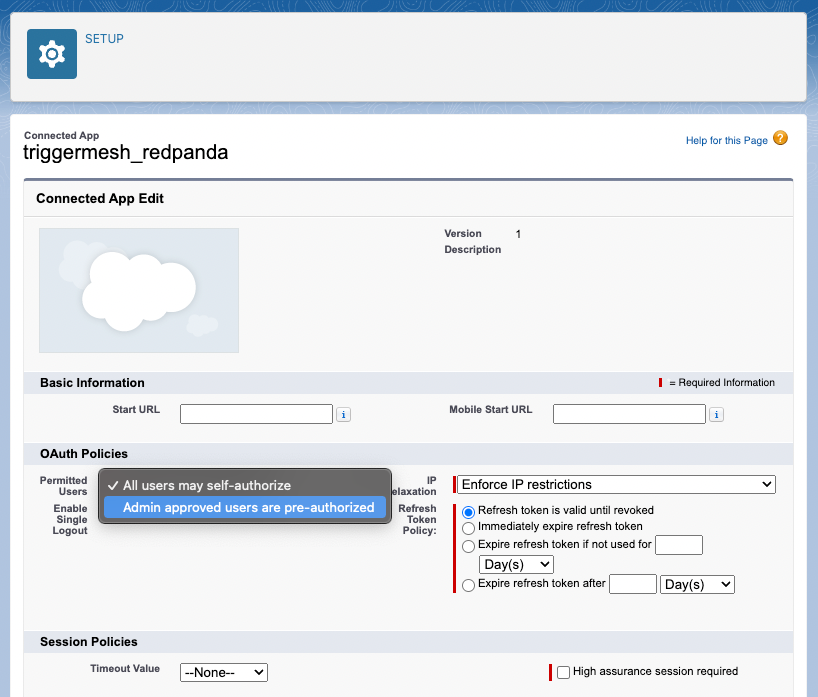
Manage. - Click
Edit policies. - Set Permitted users to
Admin approved users are pre-authorized. - Save.
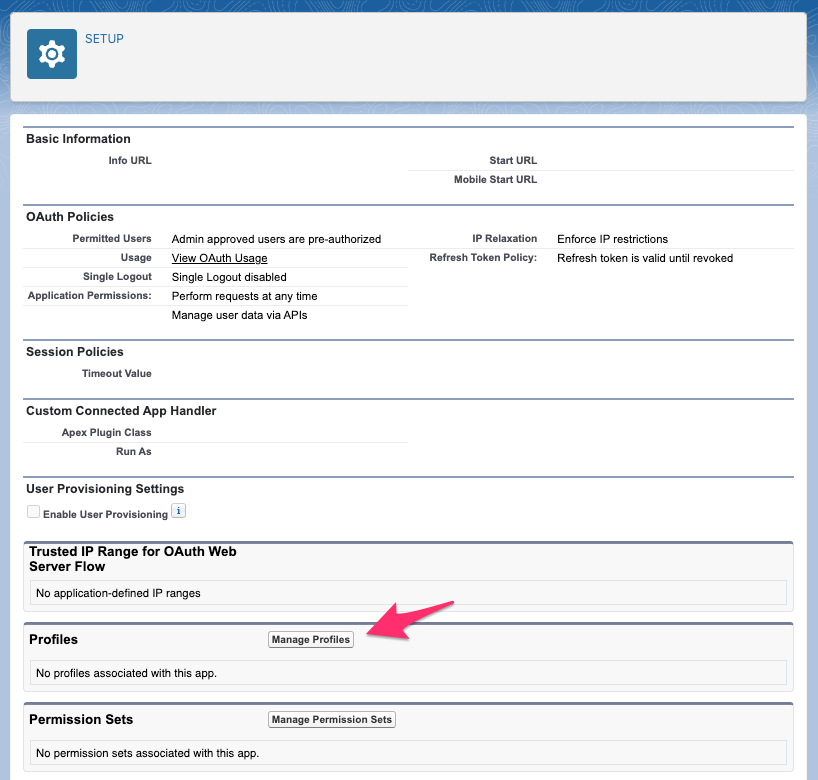
- From further down on the same page, click
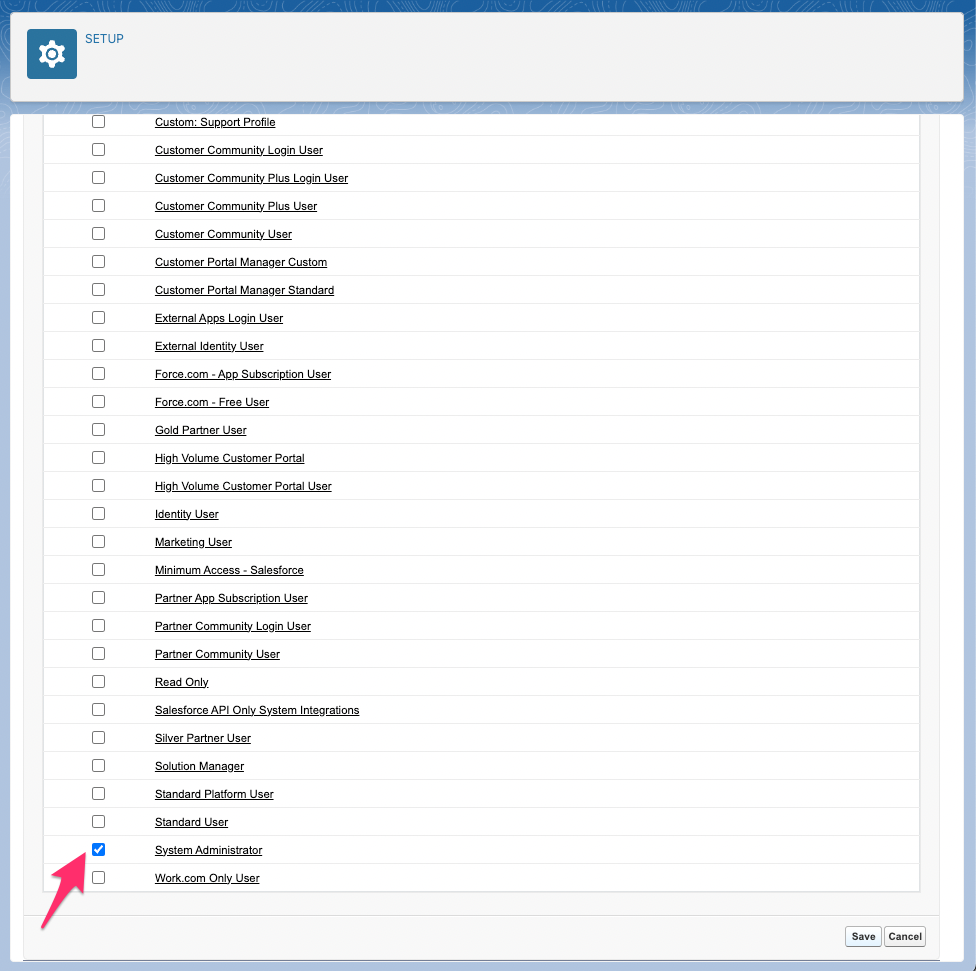
Manage Profiles. - Select the profiles that should be allowed to use this application. In our example, when creating a Salesforce developer account, we're assigned the profile
System Administrator. This is the same user we'll be using to authenticate our TriggerMesh Salesforce source to the Salesforce API. So for now, we'll only add theSystem Administratorprofile. - Save
- Fill in mandatory fields, then click
-
Retrieve OAuth data to configure TriggerMesh Source.
-
Head back to the list of apps, open the drop-down next to your app and click on
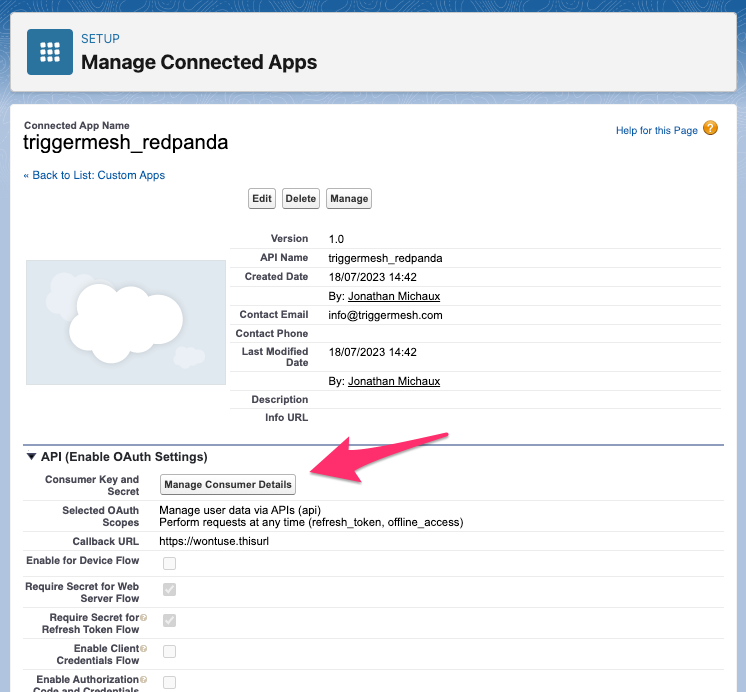
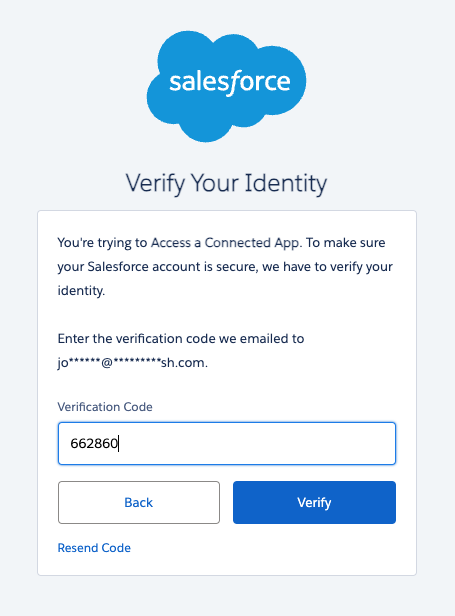
View. - Click on
Manage Consumer Details. You might need to enter an email verification code in a new window -
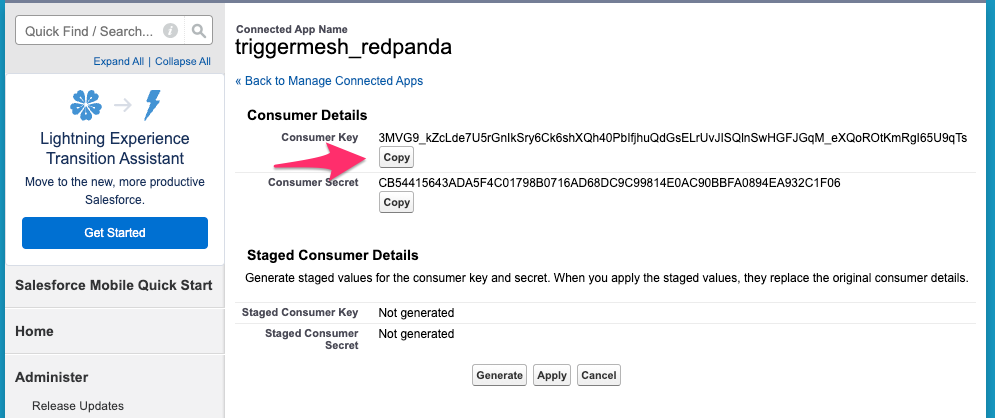
Copy the
Consumer Keyand save it somewhere handy. You won't need the secret because we're using the previously generated certificate to authenticate.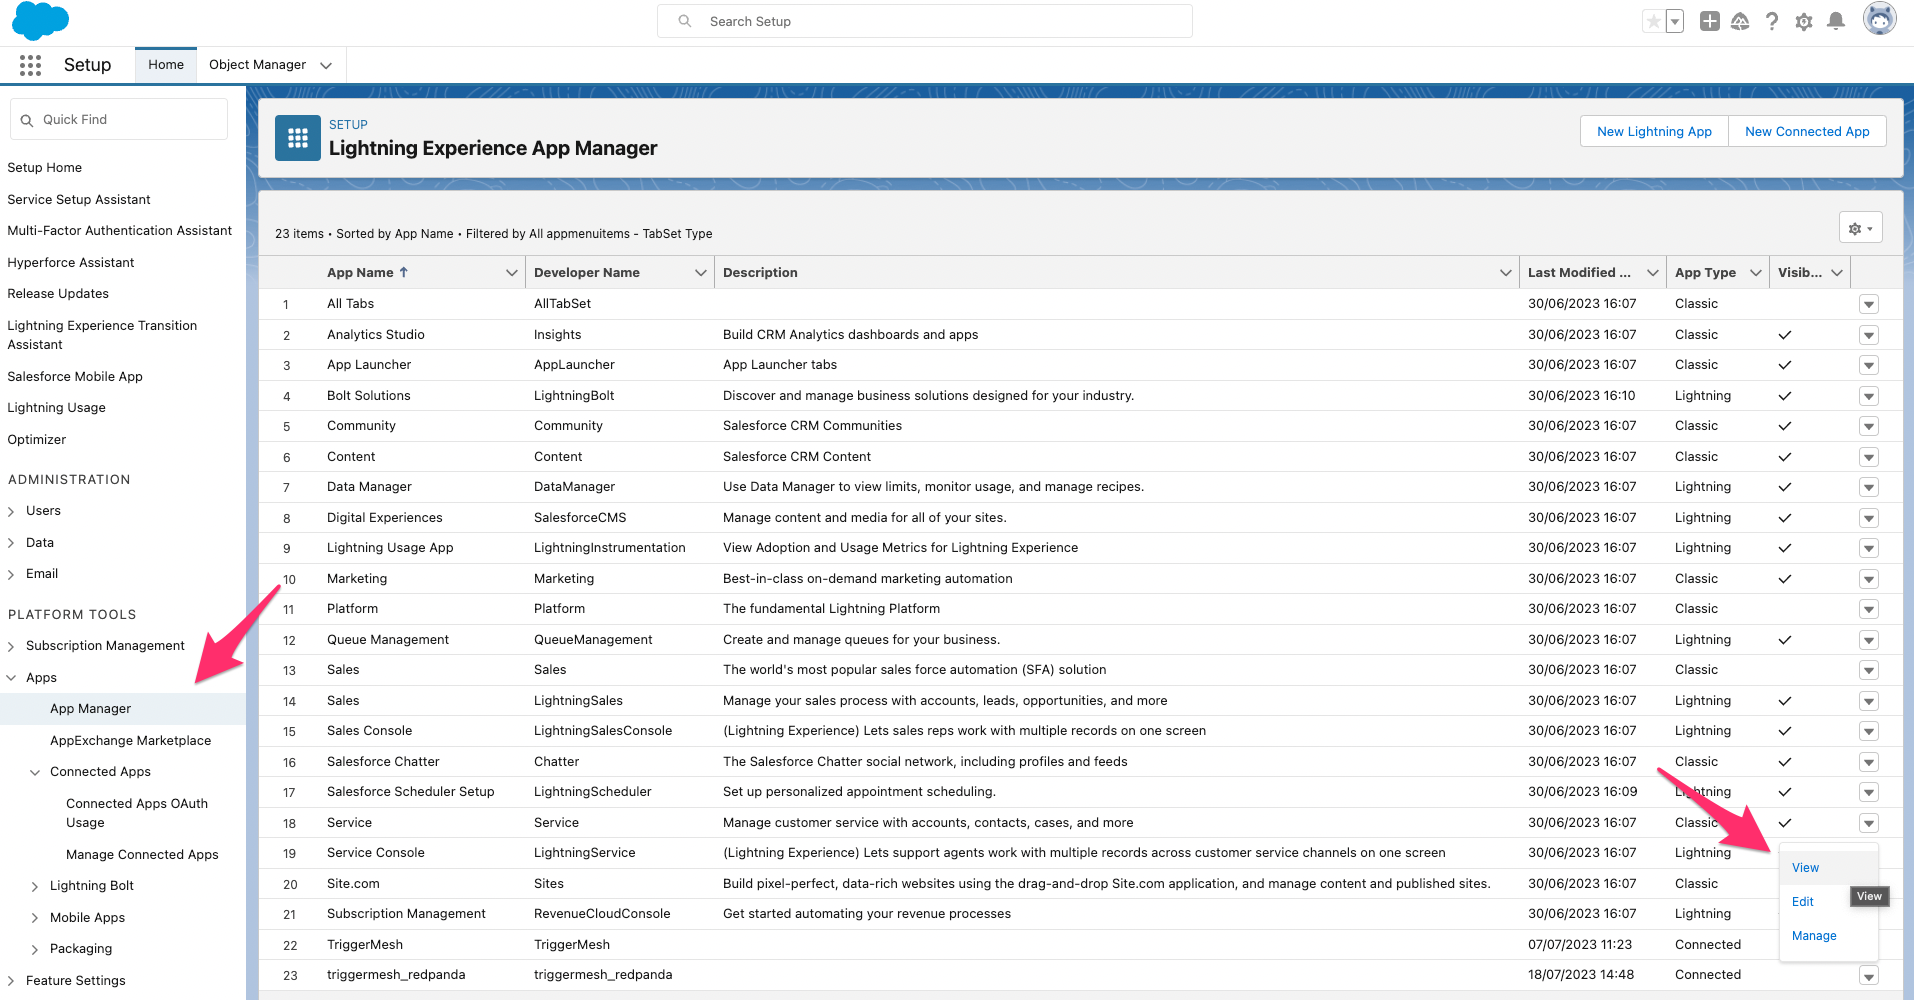
-
Configure the Change Data Capture events that you want to react to
There are a number of different "stream channels" that you can use:
- Change Data Capture events:
/data/ChangeEvents - PushTopics for streams based on single entity SOQL queries:
/topic/TicketsSold - Standard Platform Events for Salesforce event monitoring:
/event/LoginEventStream - Custom Platform Events for your SOQL platform events:
/event/MyCustom__e
Each Streaming event type has a distinct [set of features][salesroce-event-features]. Please refer to [Salesforce stream API][salesforce-stream-api-docs] on how to create stream channels.
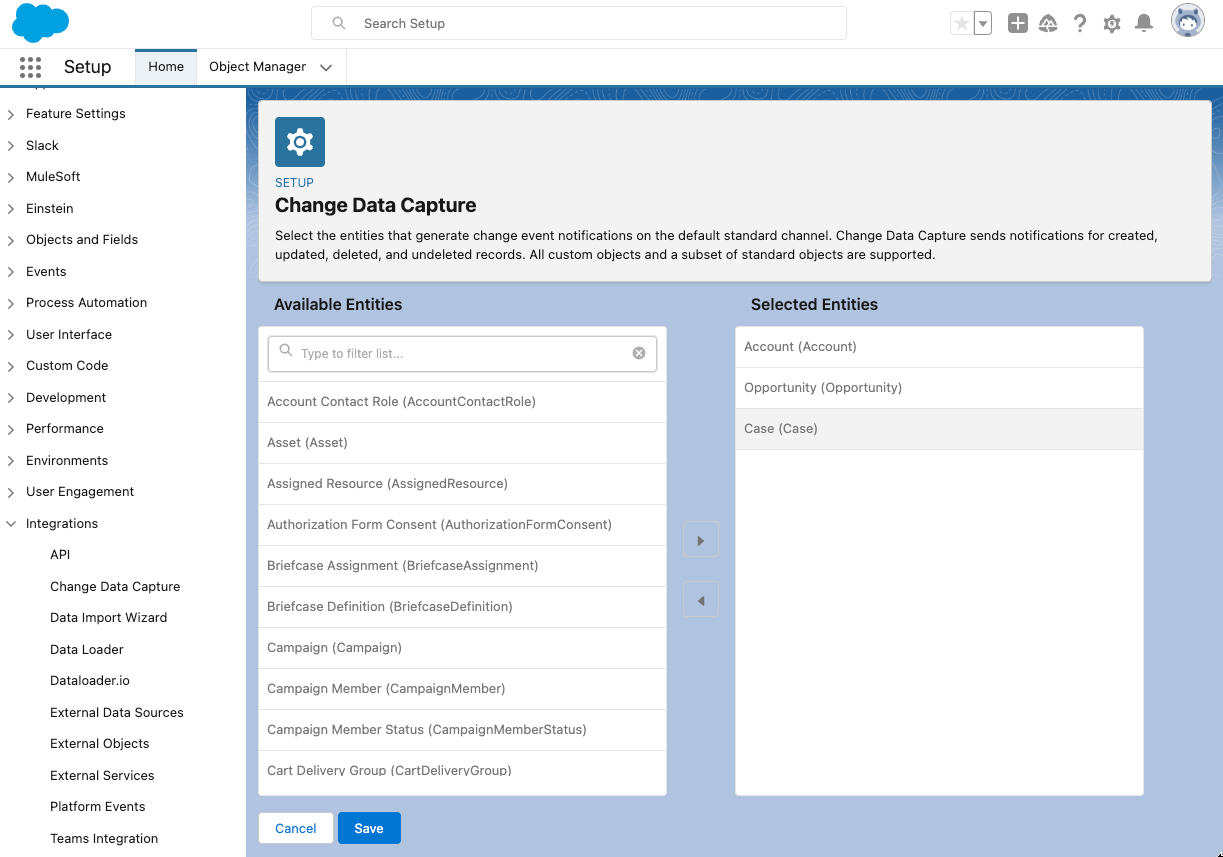
In this example we're going to use change data capture events to track changes to important sales resources such as accounts, cases, and opportunities.
Head to Setup > Integrations > Change Data Capture and enable CDC notifications for the types of objects you're interested in, such as Account, Opportunity, and Case.
Your Salesforce app is now configured and you can start ingesting events into TriggerMesh.
Ingest Salesforce events into TriggerMesh
If you want, you can create a dedicated namespace for this TriggerMesh integration:
We'll start by creating a TriggerMesh Broker that will decouple event producers and consumers and provide a reliable, push-based event delivery pipeline. Create a file called broker-v1.yaml with the following content:
apiVersion: eventing.triggermesh.io/v1alpha1
kind: RedisBroker
metadata:
  name: triggermesh-redis-broker
  namespace: sfdc-to-redpanda
Create the broker:
Now we can create a secret that will contain the Salesforce key we created earlier. Create a file called salesforce-cert-secret.yaml and enter the secret's configuration:
apiVersion: v1
kind: Secret
metadata:
  name: salesforce
  namespace: sfdc-to-redpanda
type: Opaque
stringData:
  certKey: |-
    -----BEGIN PRIVATE KEY-----
    MIIEvAIBADANB
    ...
    6GRQtbkMCfBd7V4GmIXjdg==
    -----END PRIVATE KEY-----
Create the secret:
And we can also create the salesforce source itself. Use the email address that corresponds to the user name of the account you created on Salesforce developers. Create a file called salesforce-source-v1.yaml and save it with the following contents:
apiVersion: sources.triggermesh.io/v1alpha1
kind: SalesforceSource
metadata:
  name: salesforce-source
  namespace: sfdc-to-redpanda
spec:
  subscription:
    channel: /data/ChangeEvents
    replayID: -2

  auth:
    clientID: <your consumer key, e.g. 3MVG9OvGYd.....>
    user: <your Salesforce user login email, e.g. bob2@amce.com>
    server: https://login.salesforce.com
    certKey:
      valueFromSecret:
        name: salesforce
        key: certKey
  sink:
    ref:
      apiVersion: eventing.triggermesh.io/v1alpha1
      kind: RedisBroker
      name: triggermesh-redis-broker
Create the source:
To make sure this first ingestion step is working, we'll create an event display service that logs all CloudEvents it receives, and send this service a copy of all events passing through the broker. This pattern is also known as a wiretap.
Create a file called event-display-wiretap.yaml with the following contents:
apiVersion: apps/v1
kind: Deployment
metadata:
  name: event-display
  namespace: sfdc-to-redpanda
spec:
  replicas: 1
  selector:
    matchLabels: &labels
      app: event-display
  template:
    metadata:
      labels: *labels
    spec:
      containers:
        - name: event-display
          image: gcr.io/knative-releases/knative.dev/eventing/cmd/event_display

---

kind: Service
apiVersion: v1
metadata:
  name: event-display
  namespace: sfdc-to-redpanda
spec:
  selector:
    app: event-display
  ports:
  - protocol: TCP
    port: 80
    targetPort: 8080

---

apiVersion: eventing.triggermesh.io/v1alpha1
kind: Trigger
metadata:
  name: event-display-trigger
  namespace: sfdc-to-redpanda
spec:
  broker:
    group: eventing.triggermesh.io
    kind: RedisBroker
    name: triggermesh-redis-broker
  target:
    ref:
      apiVersion: v1
      kind: Service
      name: event-display
Create the wiretap:
In a new window, watch the logs from the event display service:
kubectl get pods
NAME                                                  READY   STATUS    RESTARTS   AGE
event-display-6994b6cc4c-fvq8w                        1/1     Running   0          30s
salesforcesource-salesforce-source-847ff57bd8-ghsfk   1/1     Running   0          12m
triggermesh-redis-broker-rb-broker-74ff75d48d-rsbfc   1/1     Running   0          26m
triggermesh-redis-broker-rb-redis-778b9c8fb4-lhskm    1/1     Running   0          27m
Create a new account in Salesforce, and you should see a new change event appear in the event display logs.
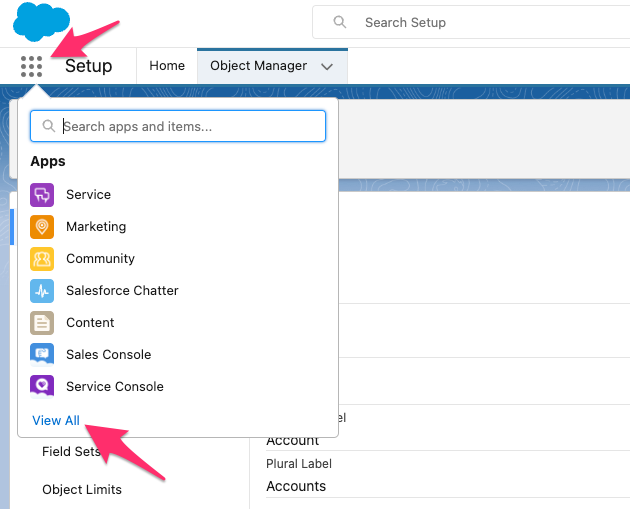
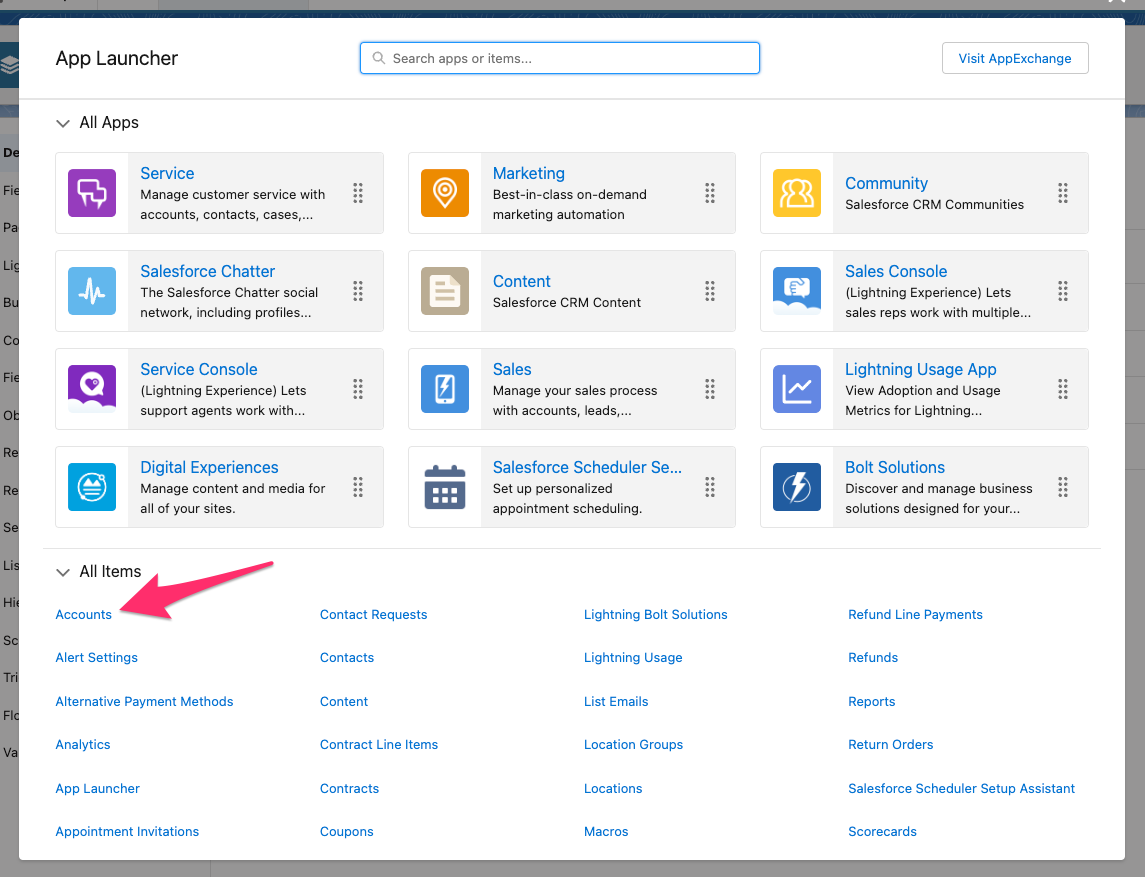
To do this, first head to the accounts page, for example by first heading to View all then selecting Accounts:
Then create a new account, for example with the name Redpanda:
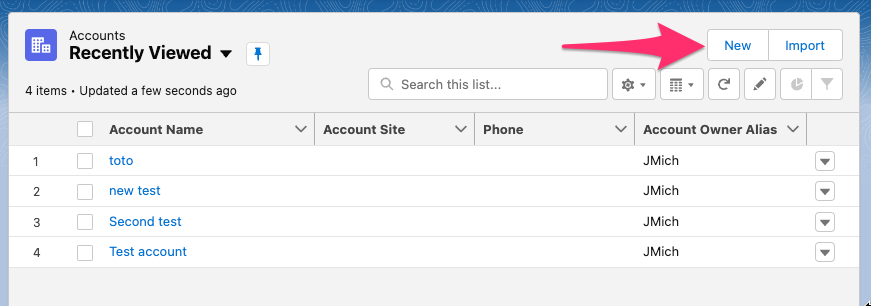
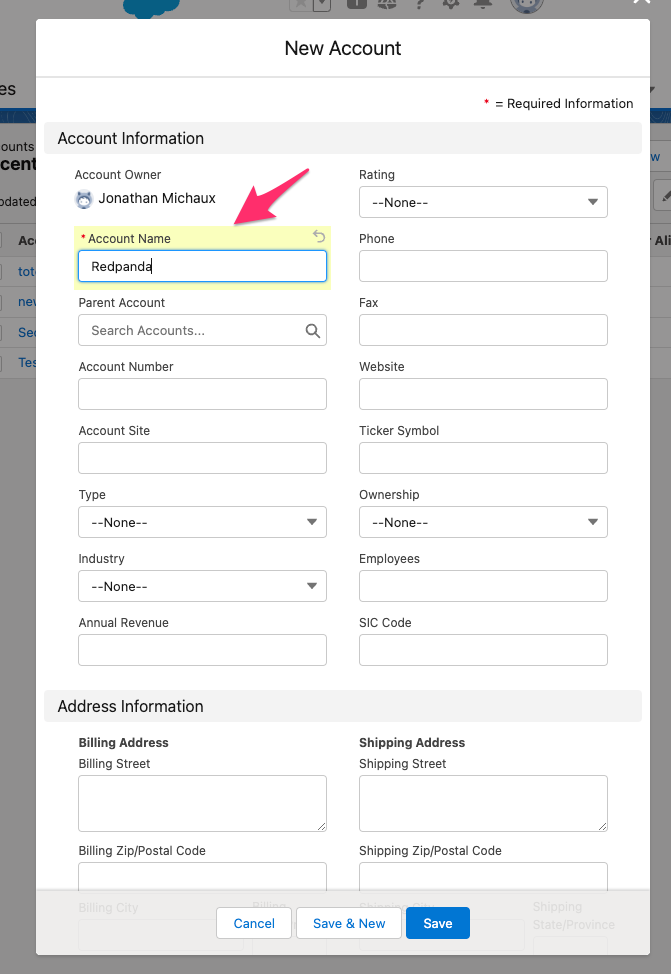
Save the new account, and then check your event display logs. You should see a new change event indicating that a new Account named Redpanda was created:
☁️  cloudevents.Event
Context Attributes,
  specversion: 1.0
  type: com.salesforce.stream.message
  source: salesforce-source/data/ChangeEvents
  subject: Account/CREATE
  id: 192ff6d1-e15f-4767-89da-c9644eec8f5c
  time: 2023-07-18T14:15:27.532305888Z
  datacontenttype: application/json
Data,
  {
    "event": {
      "createdDate": "0001-01-01T00:00:00Z",
      "replayId": 31641490
    },
    "schema": "JPyUm_b7b4SSjXobT5DOPg",
    "payload": {
      "LastModifiedDate": "2023-07-18T14:15:24.000Z",
      "Name": "Redpanda",
      "OwnerId": "0050600000H0tB5AAJ",
      "CreatedById": "0050600000H0tB5AAJ",
      "CleanStatus": "Pending",
      "ChangeEventHeader": {
        "commitNumber": 11696120723556,
        "commitUser": "0050600000H0tB5AAJ",
        "sequenceNumber": 1,
        "entityName": "Account",
        "changeType": "CREATE",
        "changedFields": [],
        "changeOrigin": "com/salesforce/api/soap/58.0;client=SfdcInternalAPI/",
        "transactionKey": "0000d388-e8a0-4796-9944-732b3a99a31d",
        "commitTimestamp": 1689689724000,
        "recordIds": [
          "00106000029G61DAAS"
        ]
      },
      "CreatedDate": "2023-07-18T14:15:24.000Z",
      "LastModifiedById": "0050600000H0tB5AAJ"
    }
  }
You'll notice that this Salesforce CDC event is wrapped into a CloudEvent, which is the native event envelope used by TriggerMesh. It includes Context Attributes that can be useful for routing events.
If we now update this account, for example by updating the account's Rating to Hot, we'll see an update notification:
☁️  cloudevents.Event
Context Attributes,
  specversion: 1.0
  type: com.salesforce.stream.message
  source: salesforce-source/data/ChangeEvents
  subject: Account/UPDATE
  id: 6833266d-417a-49c4-b40e-d76676f5d5d1
  time: 2023-07-18T14:46:51.150001926Z
  datacontenttype: application/json
Data,
  {
    "event": {
      "createdDate": "0001-01-01T00:00:00Z",
      "replayId": 31641494
    },
    "schema": "JPyUm_b7b4SSjXobT5DOPg",
    "payload": {
      "LastModifiedDate": "2023-07-18T14:46:50.000Z",
      "Rating": "Hot",
      "ChangeEventHeader": {
        "commitNumber": 11696145023574,
        "commitUser": "0050600000H0tB5AAJ",
        "sequenceNumber": 1,
        "entityName": "Account",
        "changeType": "UPDATE",
        "changedFields": [
          "Rating",
          "LastModifiedDate"
        ],
        "changeOrigin": "com/salesforce/api/soap/58.0;client=SfdcInternalAPI/",
        "transactionKey": "000171b6-1688-feb9-f59e-bb0dbfe74dbc",
        "commitTimestamp": 1689691610000,
        "recordIds": [
          "00106000029G61DAAS"
        ]
      }
    }
  }