Creating a PrivateLink to TriggerMesh Services
PrivateLink is a service that enables you to establish private connectivity between VPCs and services hosted on Amazon Web Services (AWS) or on-premises, without exposing data to the internet. Let’s look at the configuration required to access TriggerMesh services deployed on an AWS Elastic Kubernetes Service (AWS) cluster across AWS accounts over a PrivateLink connection.
Configuring the Istio Ingress Gateway
The Istio networking layer (or others such as Kourier) creates an Elastic Load Balancer (ELB) allowing public access to the TriggerMesh services running in the cluster. However, let’s consider a use-case where we want to disable the public access and instead make the services accessible over a PrivateLink.
The first thing we need to do is to configure the Istio Ingress Gateway to use
a Network Load Balancer (NLB) instead of an ELB using the annotation
service.beta.kubernetes.io/aws-load-balancer-type: nlb and to specify that
the NLB will be internal we need to add the annotation
service.beta.kubernetes.io/aws-load-balancer-internal: internal as shown in
the snippet below:
apiVersion: install.istio.io/v1alpha1
kind: IstioOperator
...
spec:
  ...
  components:
    ingressGateways:
    - enabled: true
      name: istio-ingressgateway
      k8s:
        serviceAnnotations:
          service.beta.kubernetes.io/aws-load-balancer-internal: "true"
          service.beta.kubernetes.io/aws-load-balancer-type: nlb
After the configuration has been applied successfully, we can see that the Istio Ingress Gateway is now using an NLB as shown in the screenshot below:
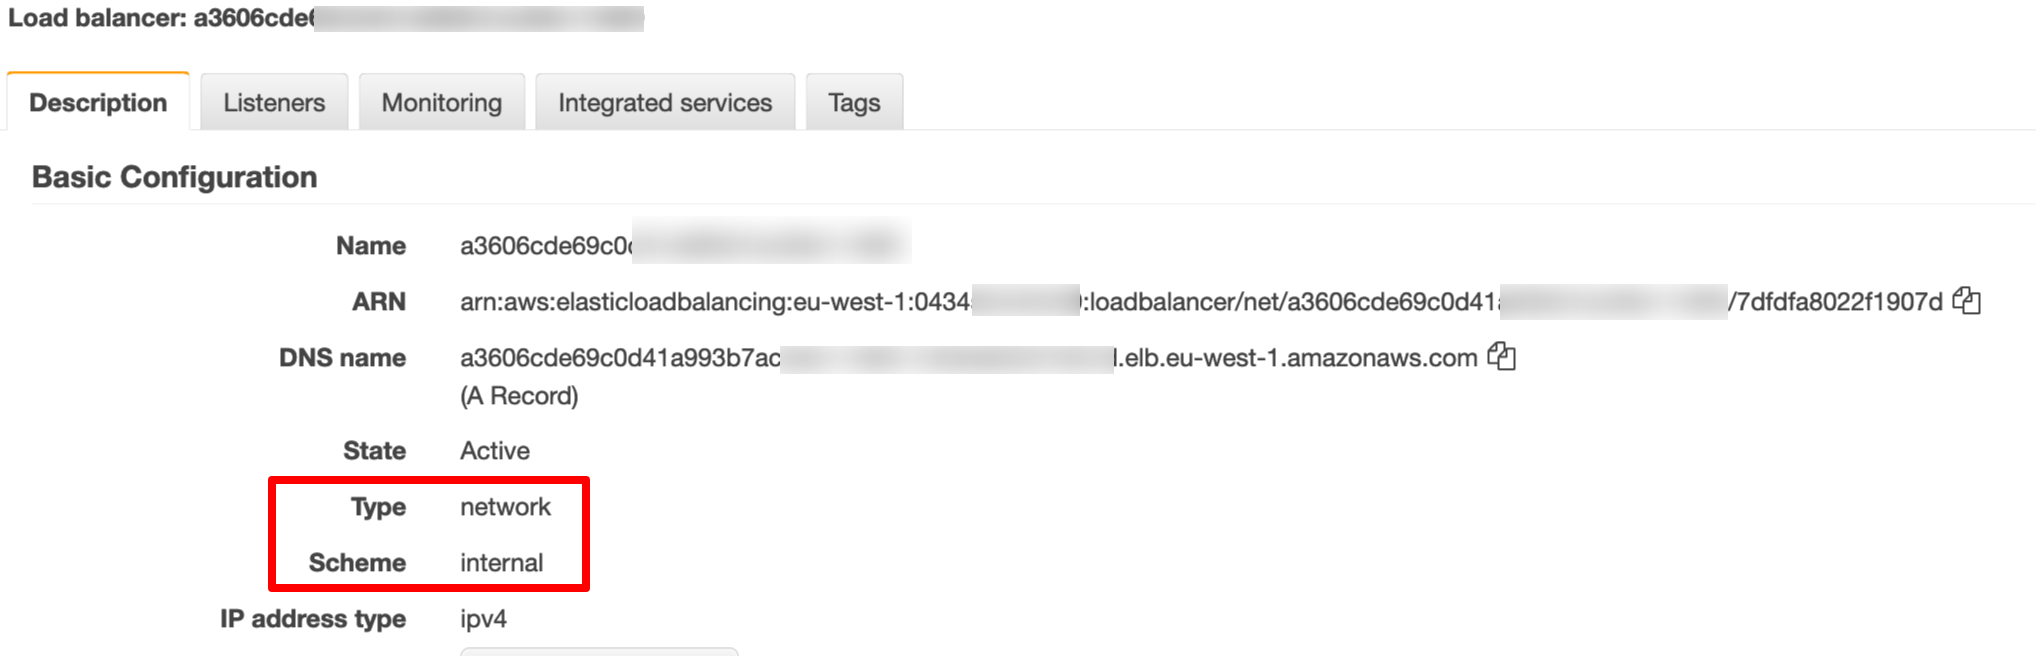
Setting up the PrivateLink endpoint service
Before we set up the PrivateLink, let’s make sure that the VPC to which our EKS cluster is attached has the DNS hostnames feature enabled. This is needed in order to be able to access our TriggerMesh services using the URL configured for the services.

To set up the service endpoint, we need to login to the AWS console and create an endpoint service. Let’s specify the Name as ksvc-endpoint-service, Load balancer type as Network and select the NLB that is associated with our Istio Ingress Gateway.
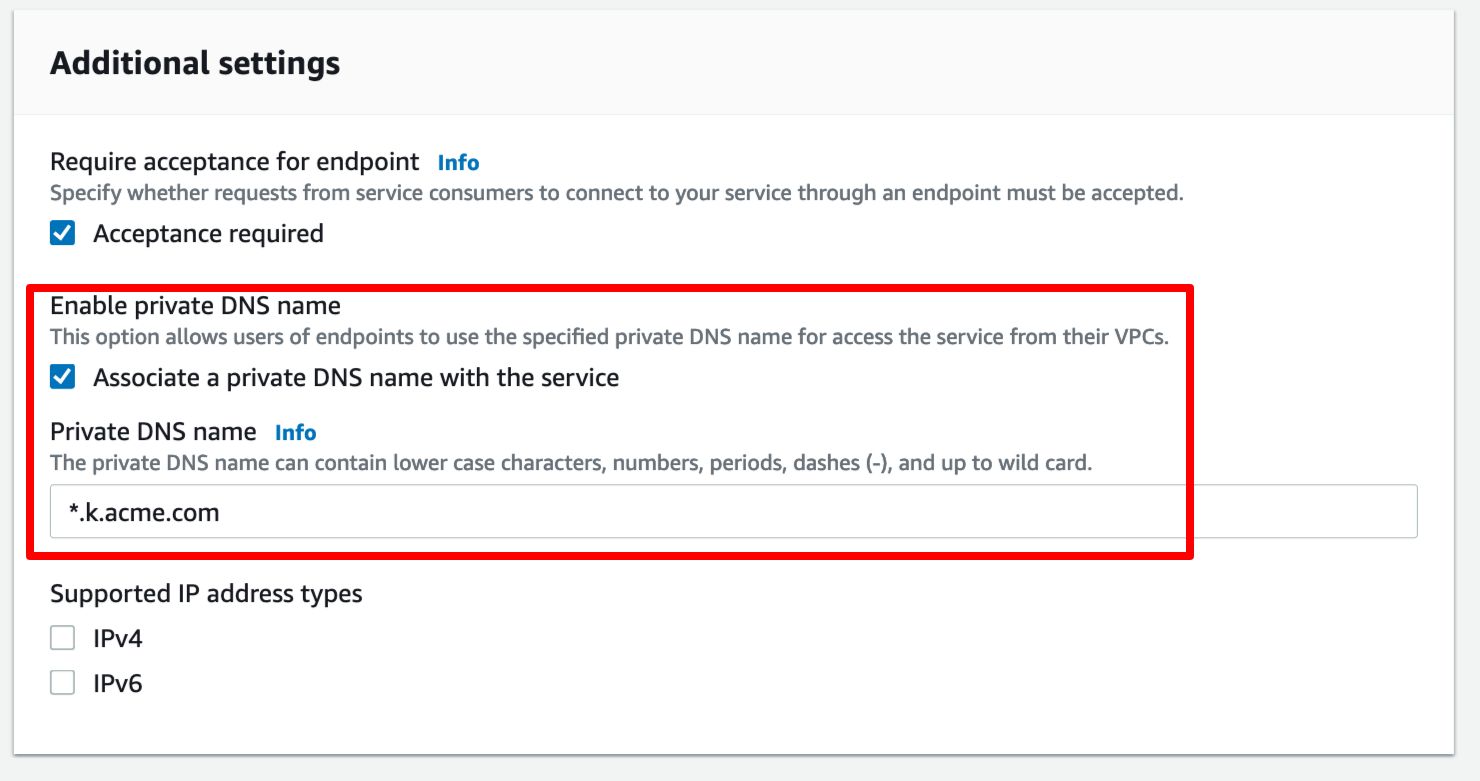
In the Additional settings section we need to enable the private DNS name
configuration and specify the domain name associated with our TriggerMesh services.
For example, if the domain of our Knative serving component is k.acme.com,
then specify the wildcard domain *.k.acme.com as the Private DNS name as
shown in the screenshot below:
Before we can start accessing the TriggerMesh endpoints using the Private DNS name, we need to verify ownership of the domain name. To do so we need to create a TXT record in our domain host with the Domain verification name and Domain verification value and trigger the verification as shown in screenshot below:
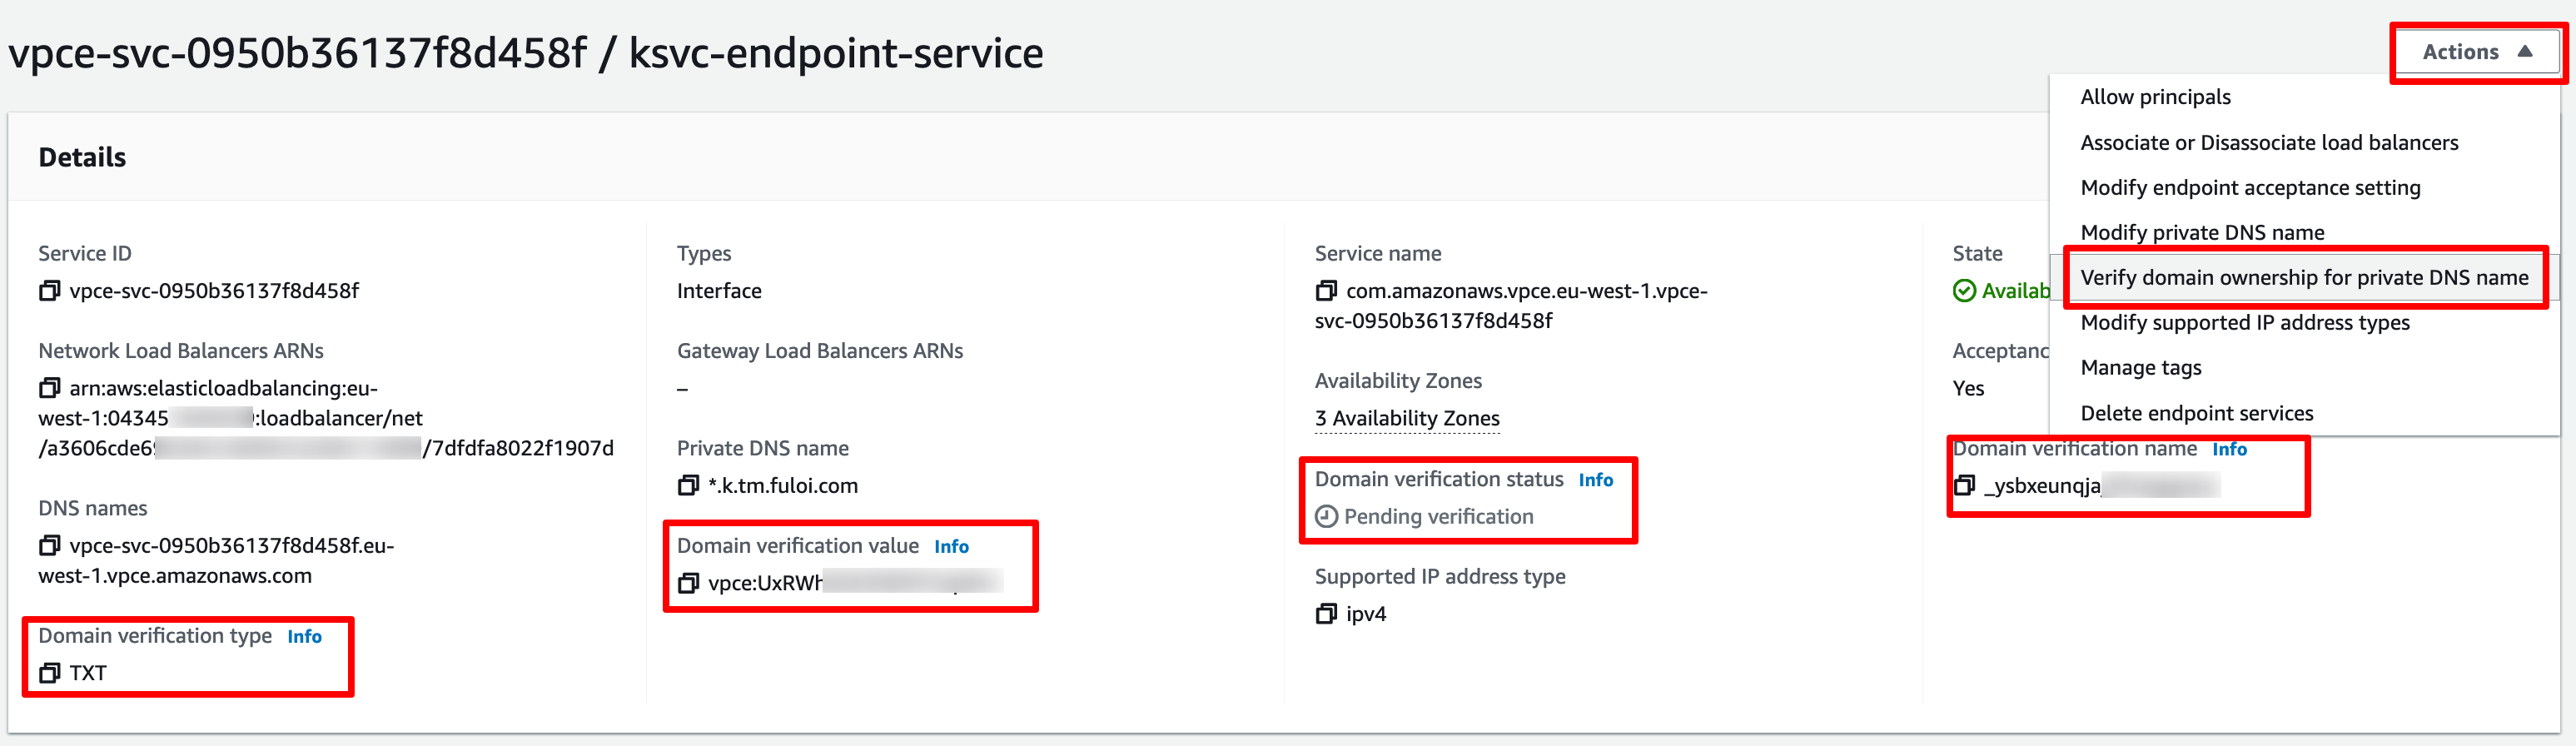
After the verification has been completed, the Domain verification status changes to Verified and we should now be able to reach our TriggerMesh services using the service URL.
Connecting to the endpoint service
Now that we have the services exposed on a VPC endpoint service, we can now access the TriggerMesh services from another VPC in the same AWS account as well as from another AWS account. Let’s try accessing the TriggerMesh services from another AWS account.
To allow access to the service endpoint we need to first add the Amazon Resource Name (ARN) of the AWS root account under the Allow Principals tab. This is the ARN of the account from where we will be accessing the services, let's call this the consumer.

Login to the VPC dashboard of the AWS account of the consumer and create an endpoint connection. It’s important to note that you need to be in the same region as the endpoint service in order to establish a PrivateLink connection.
Let’s name the endpoint connection ksvc-endpoint, for the Service category choose Other endpoint services, enter the Service name of our service endpoint and click on Verify service.
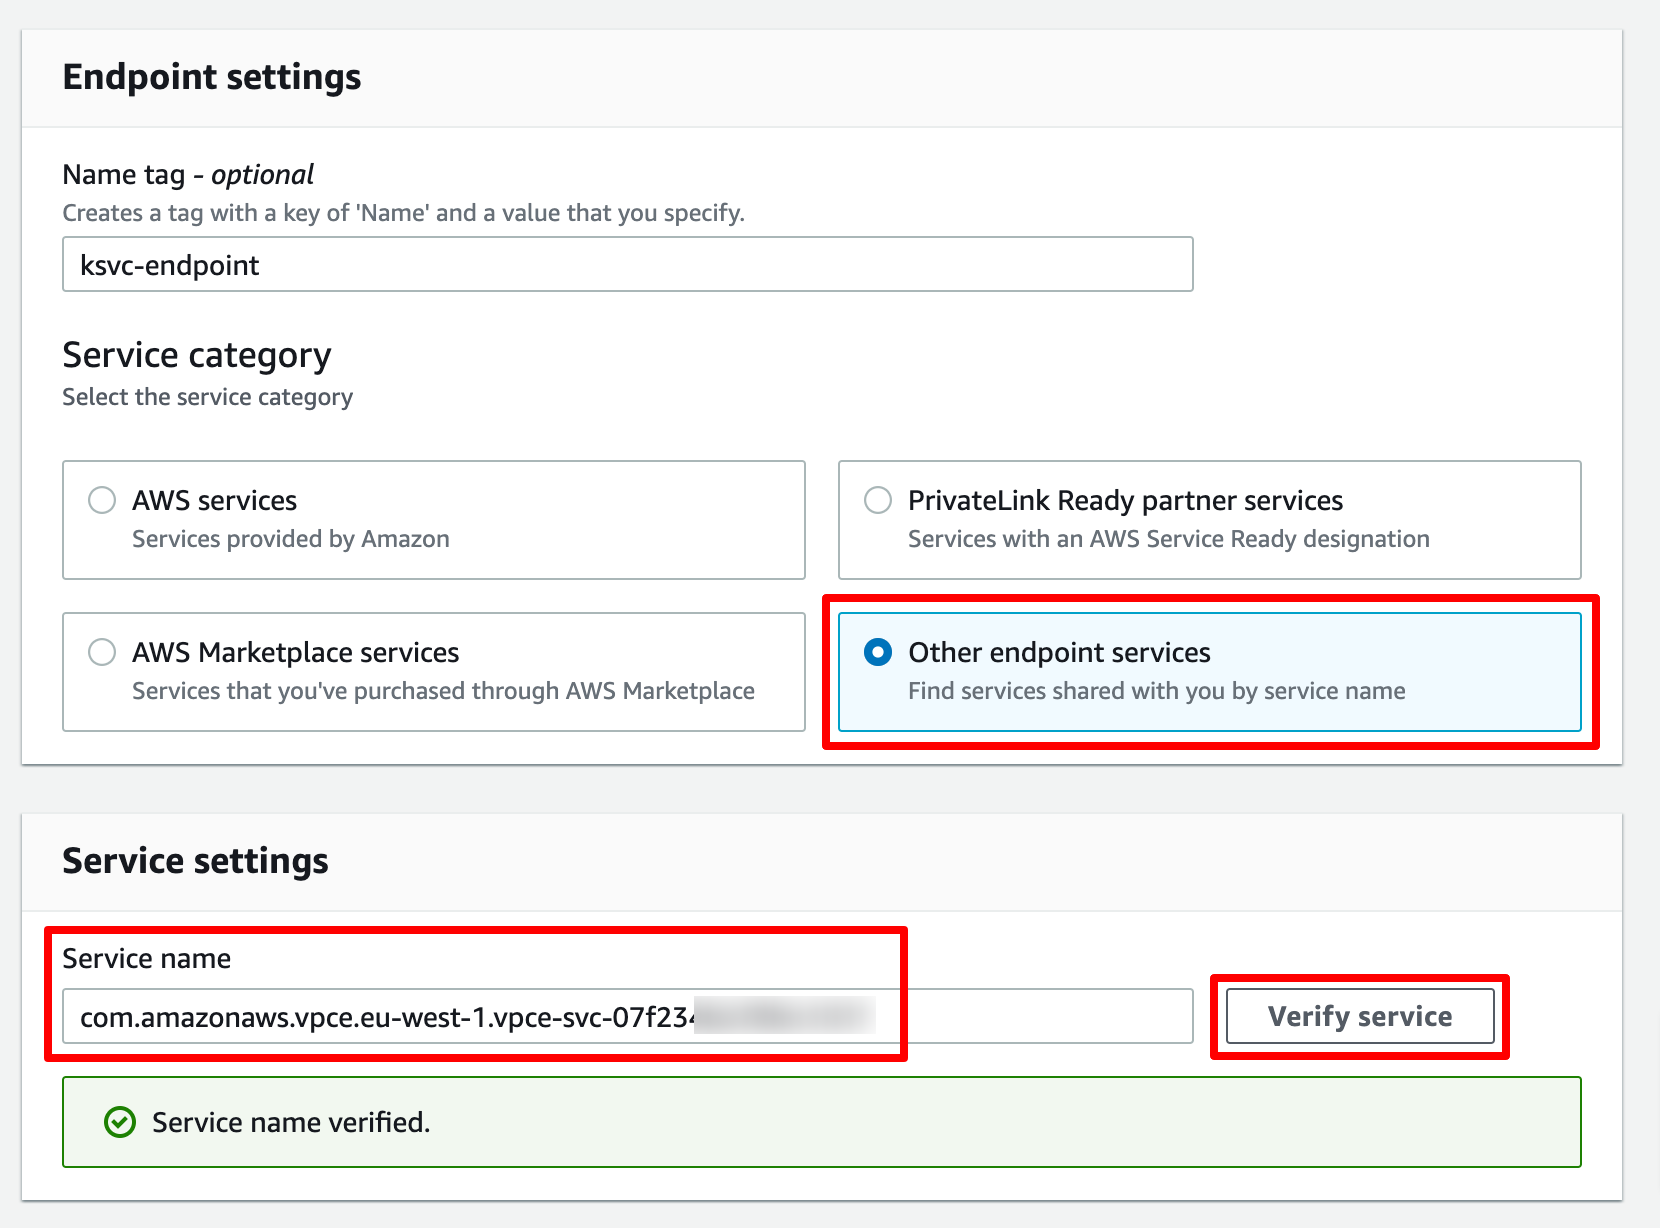
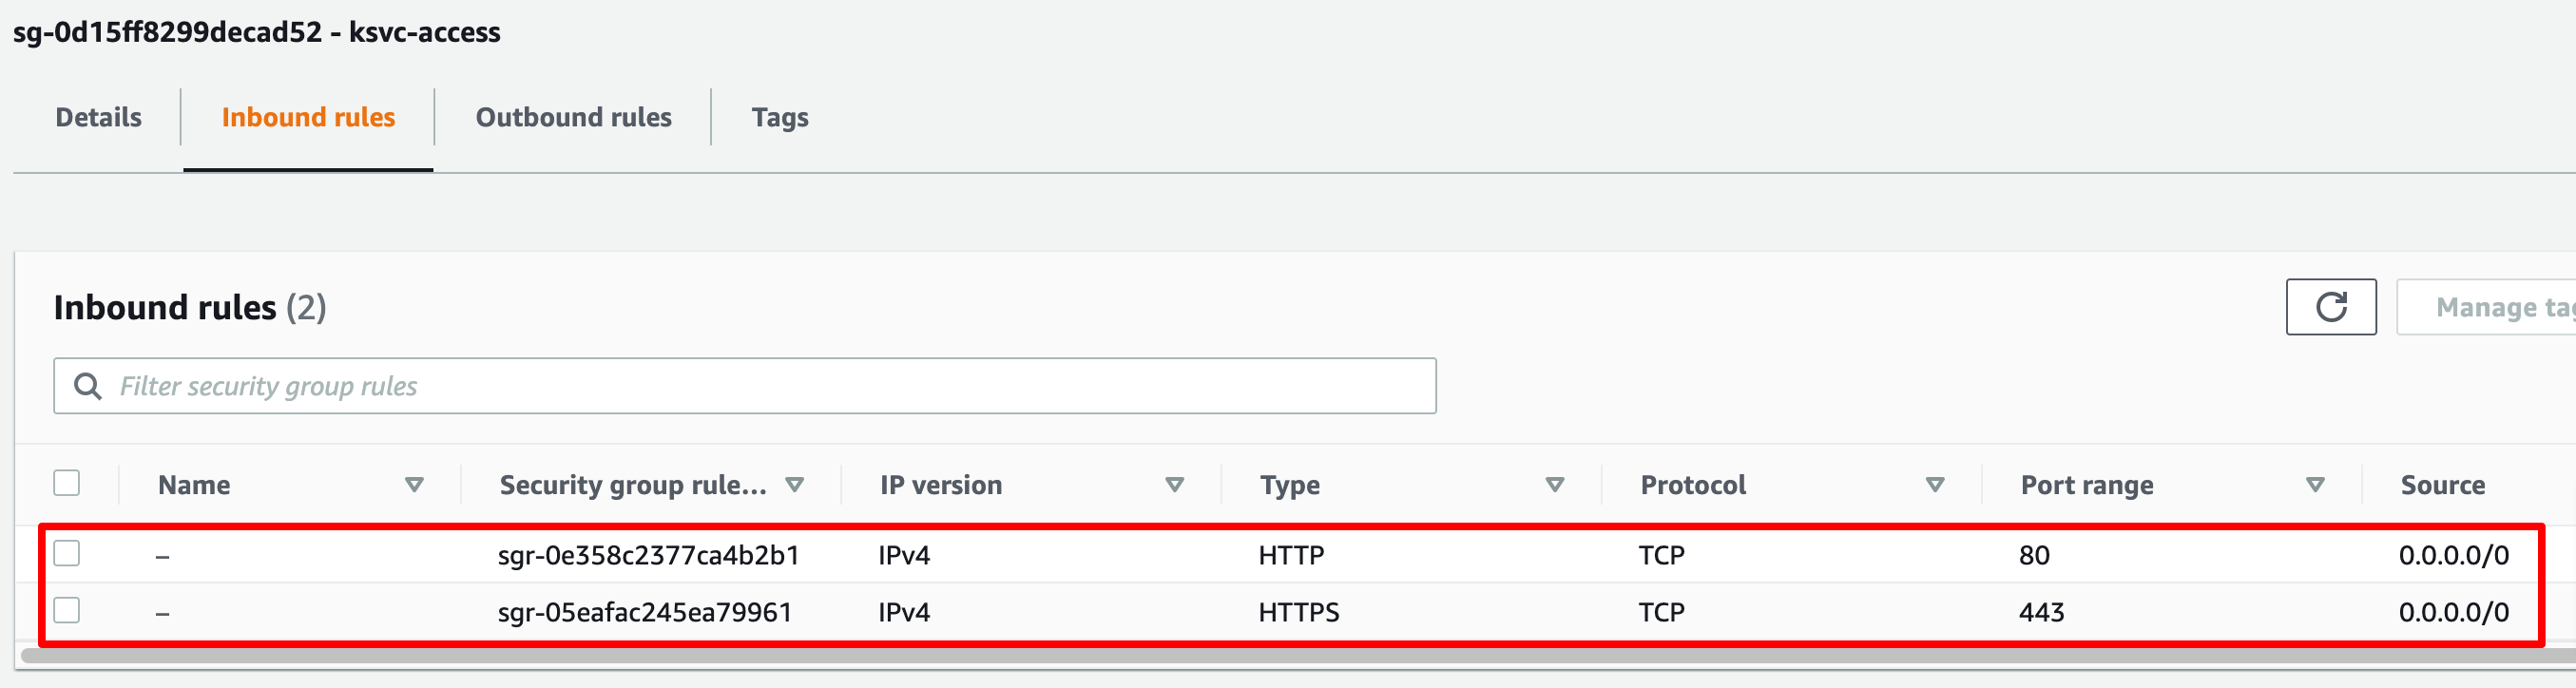
Select the VPC and Subnets on which you want to make the endpoint connection available and finally specify the security groups to associate with the endpoint. We need to ensure that our security group allows HTTP/HTTPS connection requests as shown in the screenshot below:
Upon creating the endpoint, we need to go back to the VPC service endpoint and accept the connection request.

Once the connection request has been accepted it takes a few minutes for the endpoint connection to become Available in the consumer account. Lastly, in order to access the TriggerMesh services using their URLs, we need to Enable private DNS names which is available under the Modify private DNS name action menu item of the endpoint connection as shown below:

Accessing TriggerMesh services
To access the TriggerMesh services via the PrivateLink, we can create an EC2 instance, in the consumers AWS account, on the same VPC in which the endpoint was created and use cURL to reach the TriggerMesh service endpoints.
For demonstration, I have deployed the TriggerMesh WebhookSource in the EKS cluster and the URL for the service is http://webhook.k.acme.com. This endpoint can now simply be reached from the EC2 instance as shown below: